

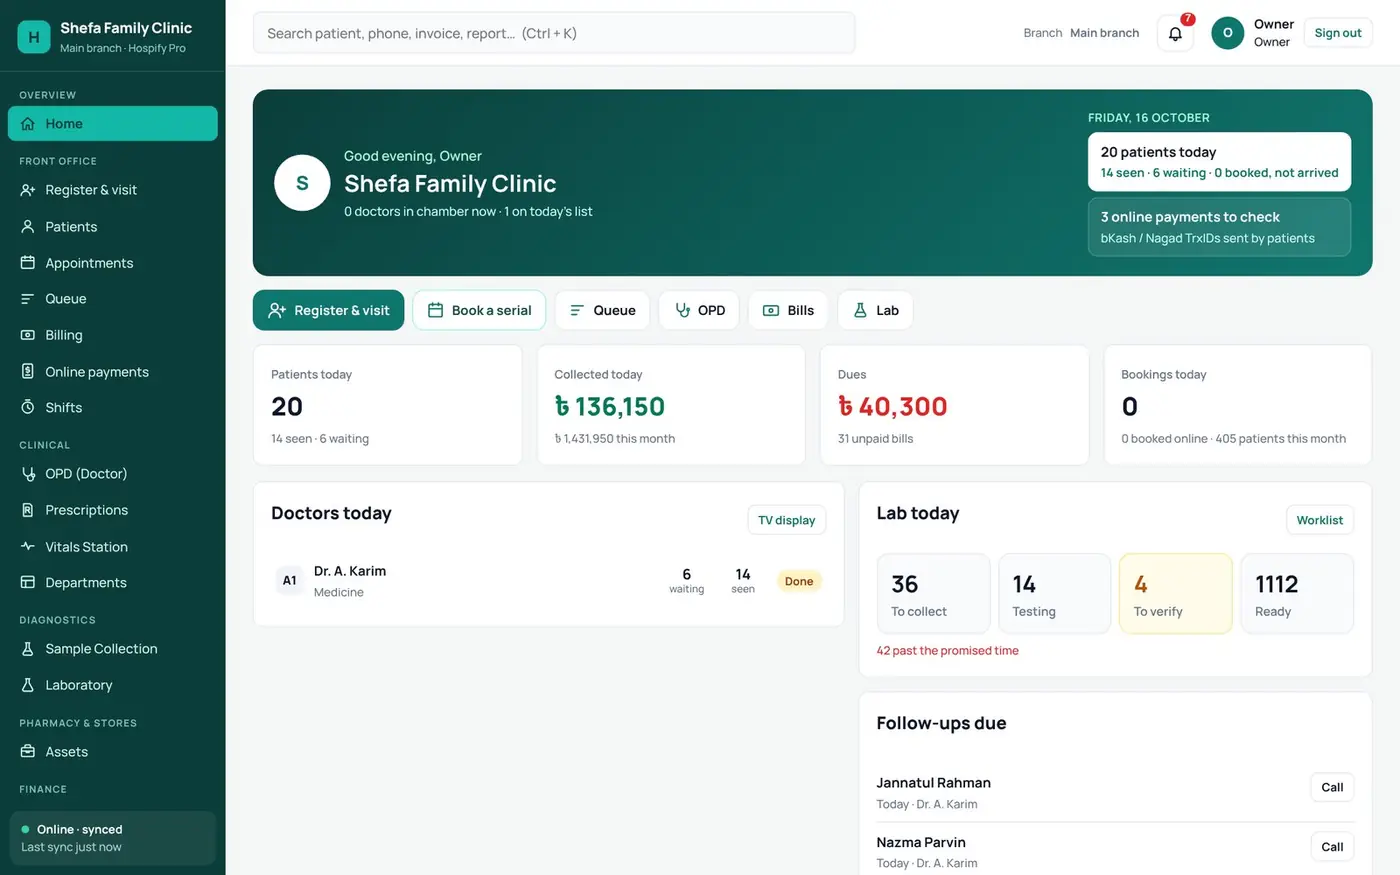
Sign in, add your clinic name, logo, doctors and timings, then run each patient from serial to vitals, prescription, lab and bill. Reports and your clinic website are built in.
In this guide 8 sections
This guide walks owners, managers and staff of clinics and polyclinics through every step, using the real screens of the Hospify Pro clinic demo. You can follow along in the live clinic demo without signing up.
Who this is for: clinics and polyclinics. What you need: a computer or tablet with a browser, and a thermal or A4 printer for receipts and prescriptions.
Part 1: Set up your clinic
Step 1: Send a sign-up request
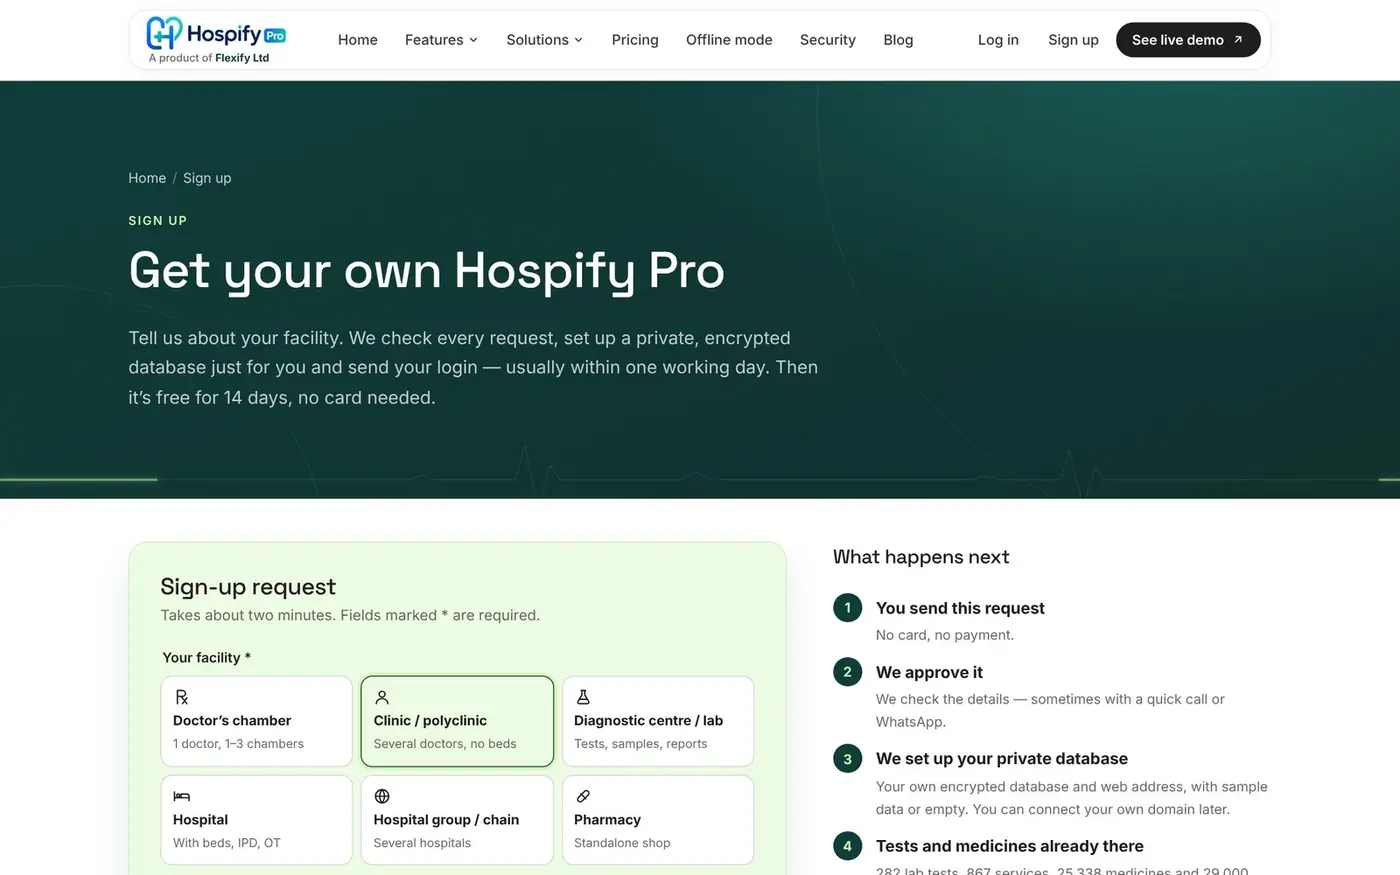
First, go to hospify dot pro, slash signup. Choose Clinic or polyclinic, then fill in your name, phone, email and the web address you want. The team sets up your private database and sends your login, usually within one working day. The first fourteen days are free.
- hospify.pro/signup
- Choose Clinic / polyclinic
- 14 days free · no card
Step 2: Name, logo and print header
Open Settings, then Profile and printing. Add your clinic’s name, logo, address and licence line. They print on every receipt and prescription.
- Settings → Profile & printing
- Logo · address · licence
- Prints on every receipt

Step 3: Add your doctors
In Doctors and fees, add each doctor with their room, serial letter, and new, old and report-check fees.
- Settings → Doctors & fees
- Room · serial letter
- New, old and report fees

Step 4: Chamber times
In Doctor timings, add each doctor’s weekly sessions, leave and holidays. Serials are only offered inside these times.
- Settings → Doctor timings
- Weekly sessions
- Leave and holidays

Step 5: Staff logins
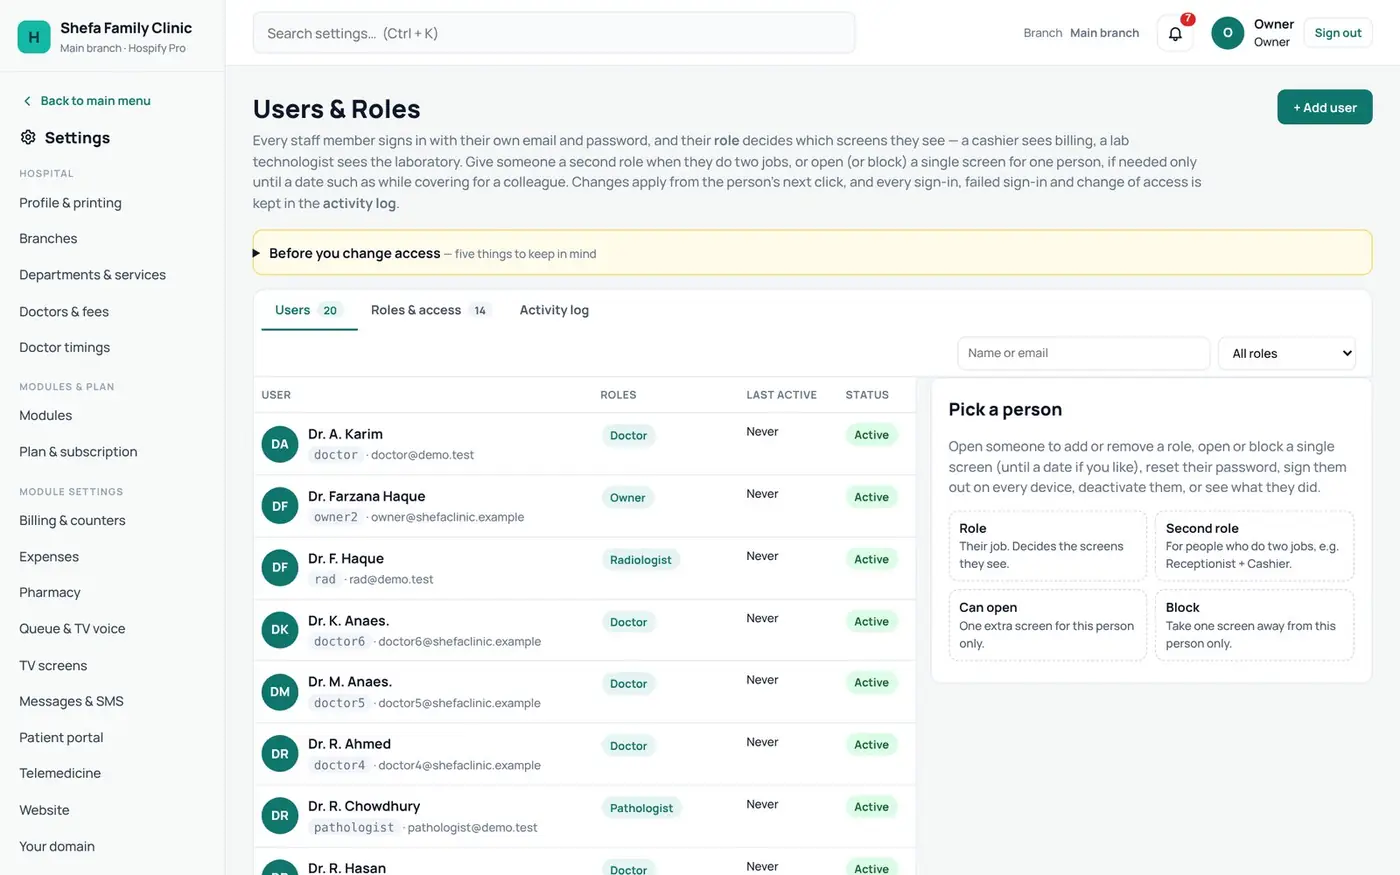
In Users and roles, give every staff member their own login and role.
- Settings → Users & roles
- Receptionist · Cashier · Nurse
- Each role sees its own screens
Part 2: Serials and the front desk
Step 6: Book a serial
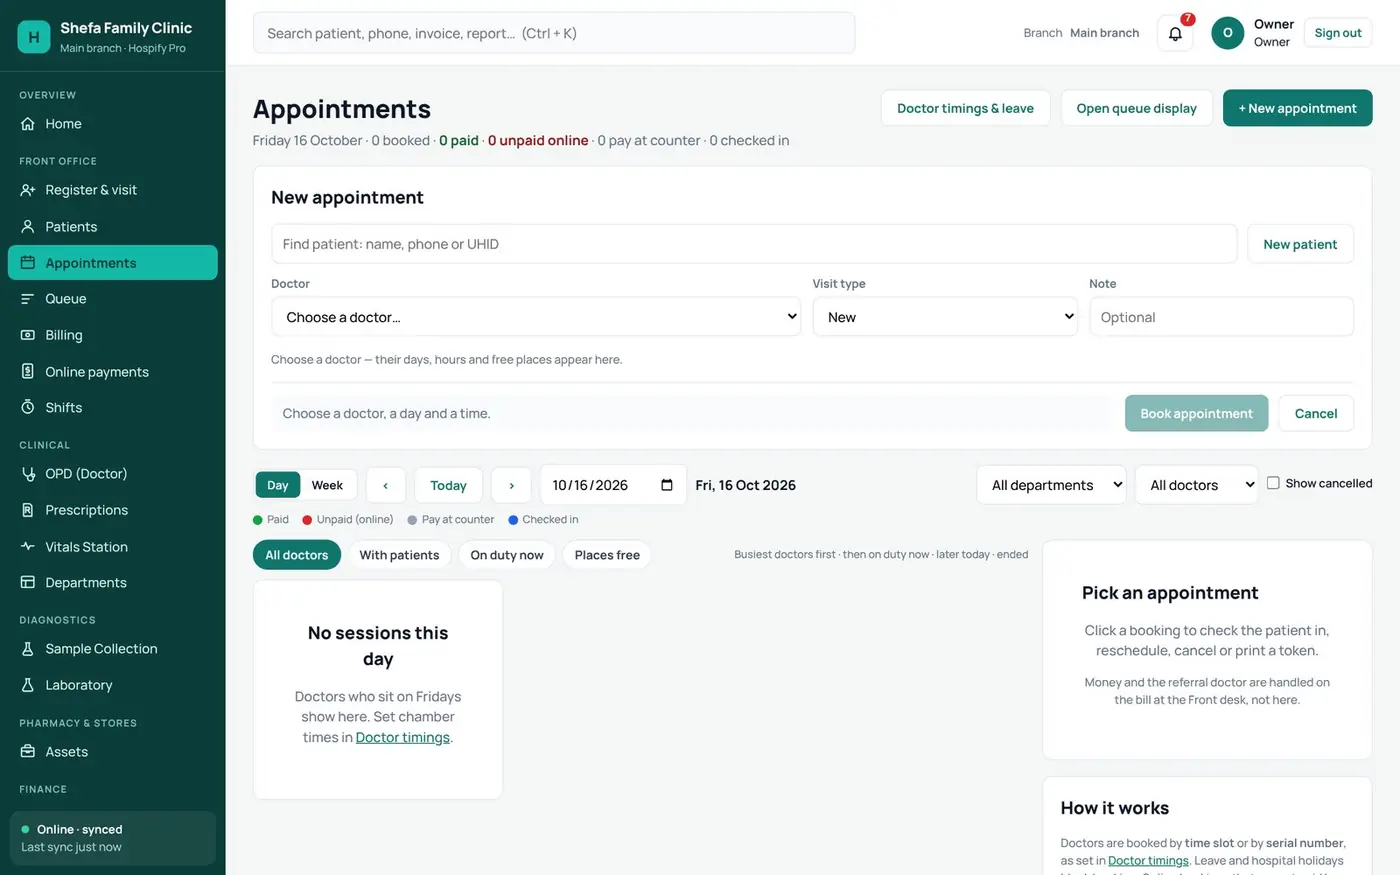
To book a serial, open Appointments and press New appointment. Pick the patient, doctor, visit type and time. With SMS on, the patient gets a confirmation.
- Appointments → New appointment
- Doctor · visit type · time
- SMS confirmation
Step 7: Register and take the fee
At the front desk, search by phone, register the patient, and choose the doctor. The fee for a new or old patient is picked automatically, and tests can go on the same bill.
- Search by phone first
- Doctor fee is detected
- Add tests on the same bill

Step 8: The money receipt
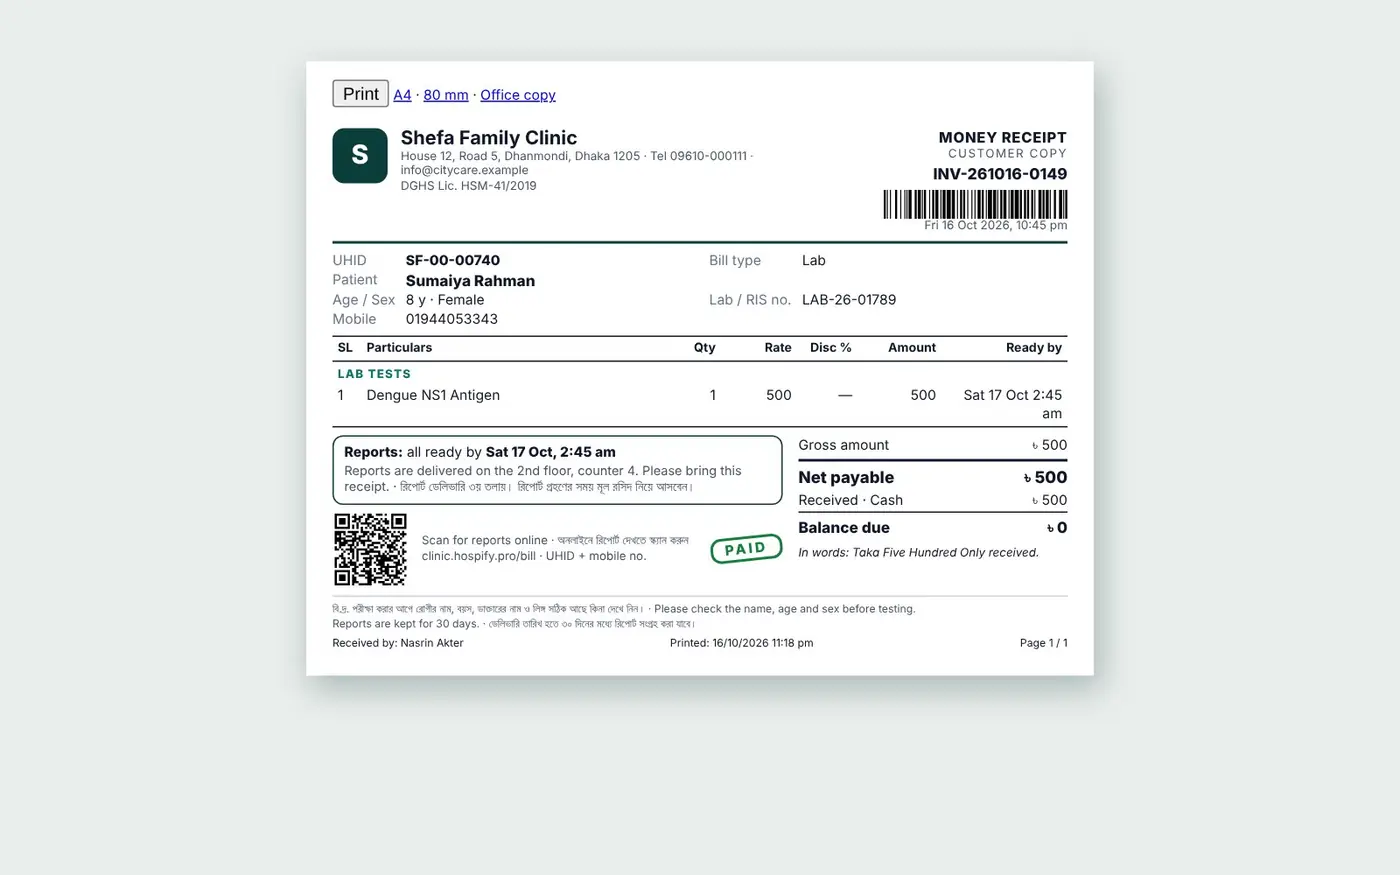
The receipt prints with the serial, the room, and a Q R code to check the bill.
- Serial and room
- Where to go next
- QR to check the bill
Step 9: Queue and TV display
The waiting-room T V shows who is next for each doctor, and calls the serial with a voice announcement.
- Who is next, room by room
- Voice calls the serial
- Lab reports ready

Part 3: Vitals and the doctor
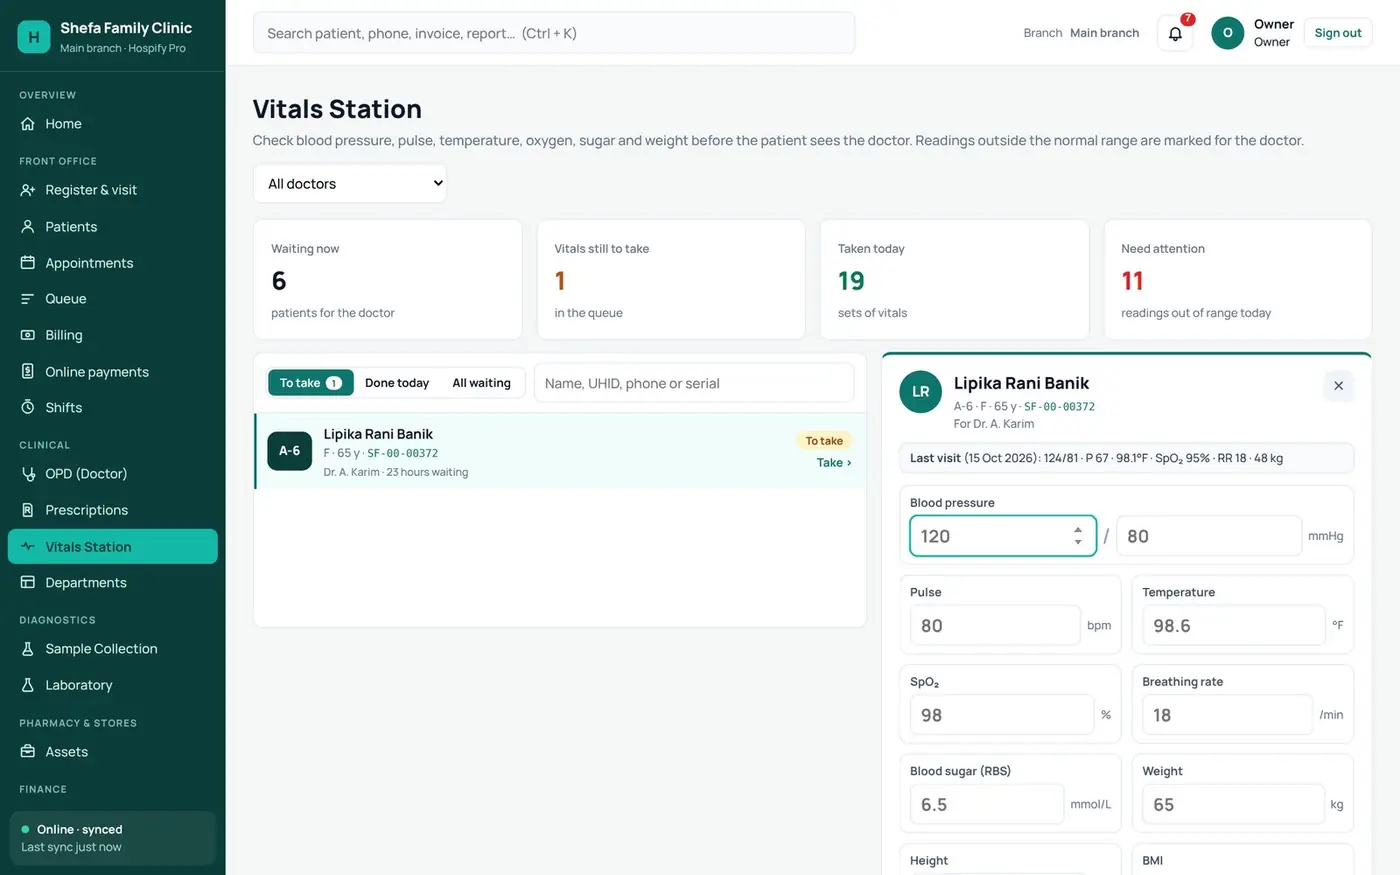
Step 10: Take vitals
At the vitals station, the nurse records blood pressure, pulse, oxygen, sugar and weight. Readings outside the normal range are marked for the doctor.
- BP · pulse · SpO₂ · sugar · BMI
- Abnormal values marked
- Compared with last visit
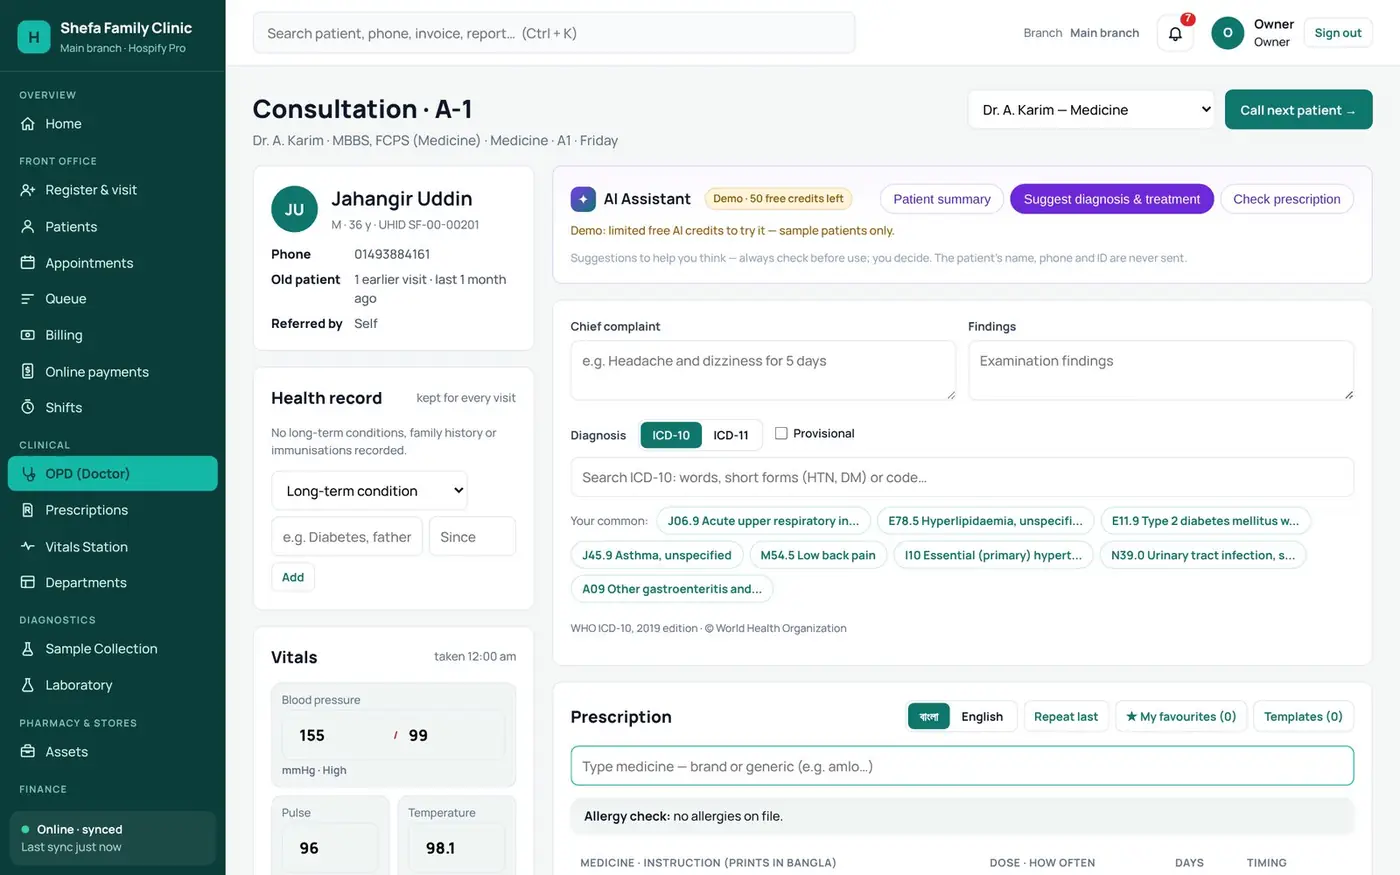
Step 11: The doctor’s screen
The doctor calls the next patient and sees their history and vitals on one screen, then adds the diagnosis, medicines, tests and advice.
- Call next patient
- History and vitals
- ICD-10/11 and medicines
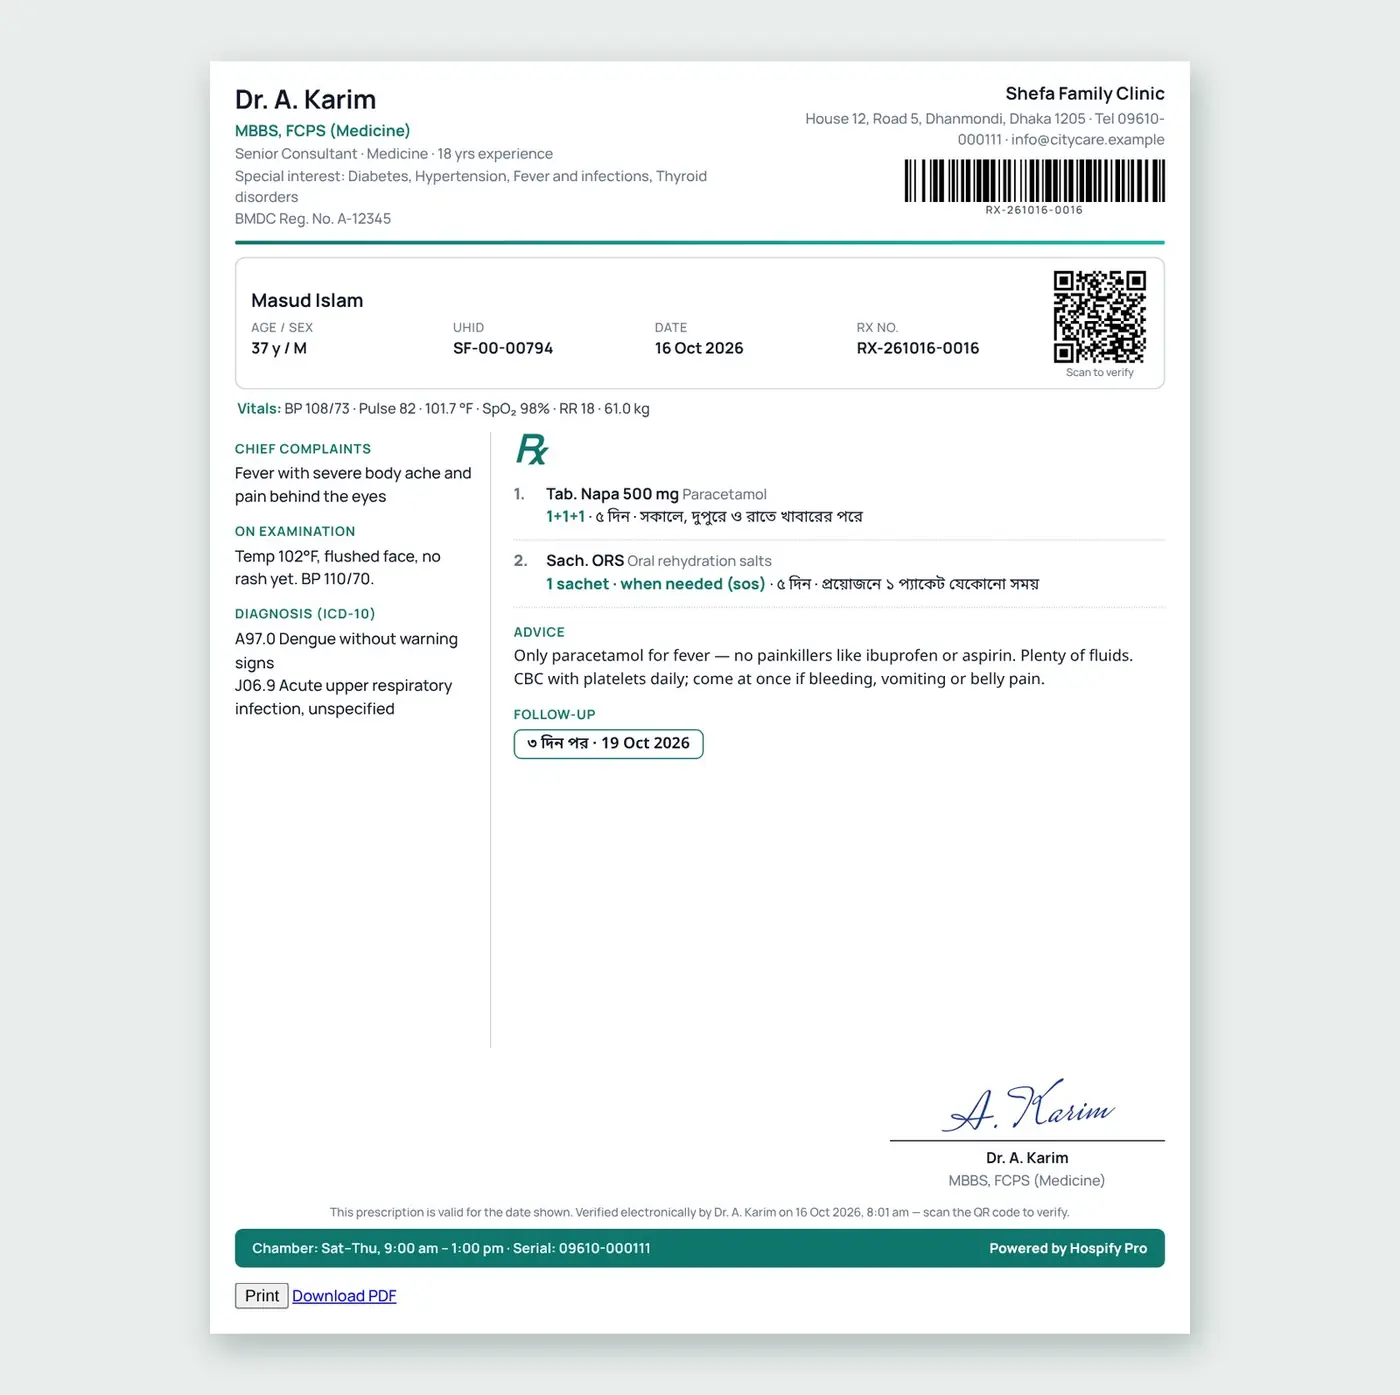
Step 12: The prescription
The prescription prints on the doctor’s letterhead, with Bangla dose instructions and the follow-up date.
- Doctor’s letterhead
- Bangla dose instructions
- Follow-up date
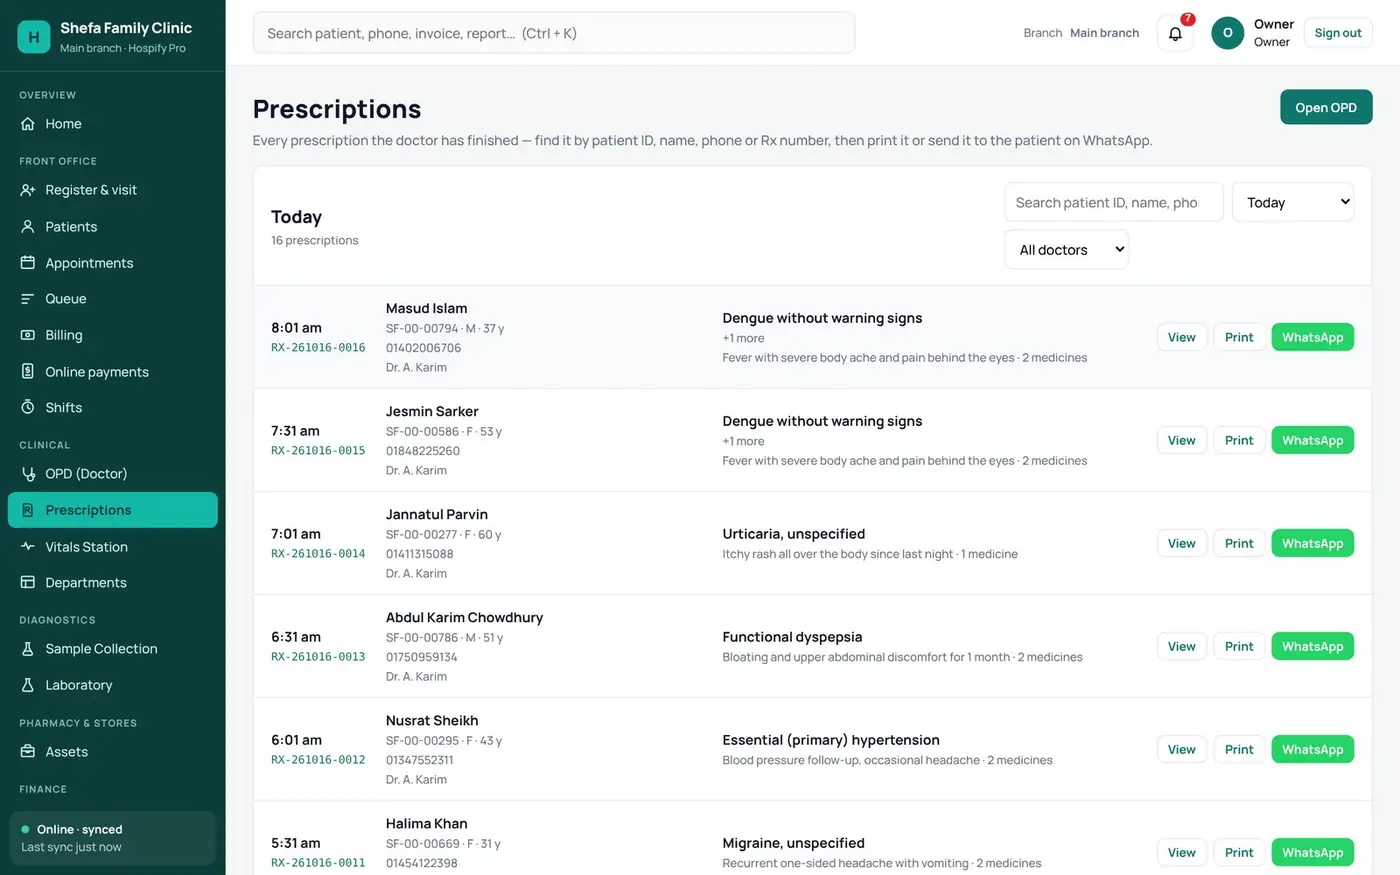
Step 13: Send on WhatsApp
Every finished prescription can be printed again, or sent to the patient on WhatsApp.
- Every finished prescription
- Print or WhatsApp
- Search by patient or Rx no.
Part 4: Lab and billing
Step 14: Lab tests in the clinic
Tests the doctor orders go on the patient’s bill, then through sample collection, results and verification.
- Tests ordered by the doctor
- Sample → result → verify
- Reports ready
Step 15: The lab report
The verified lab report prints, or goes to the patient on WhatsApp.
- Reference ranges
- Verified and locked
- WhatsApp or print

Step 16: Billing and dues
Billing shows every bill, what’s waiting for payment, and dues to collect.
- Every bill today
- Waiting for payment
- Collect dues

Step 17: Referral commission
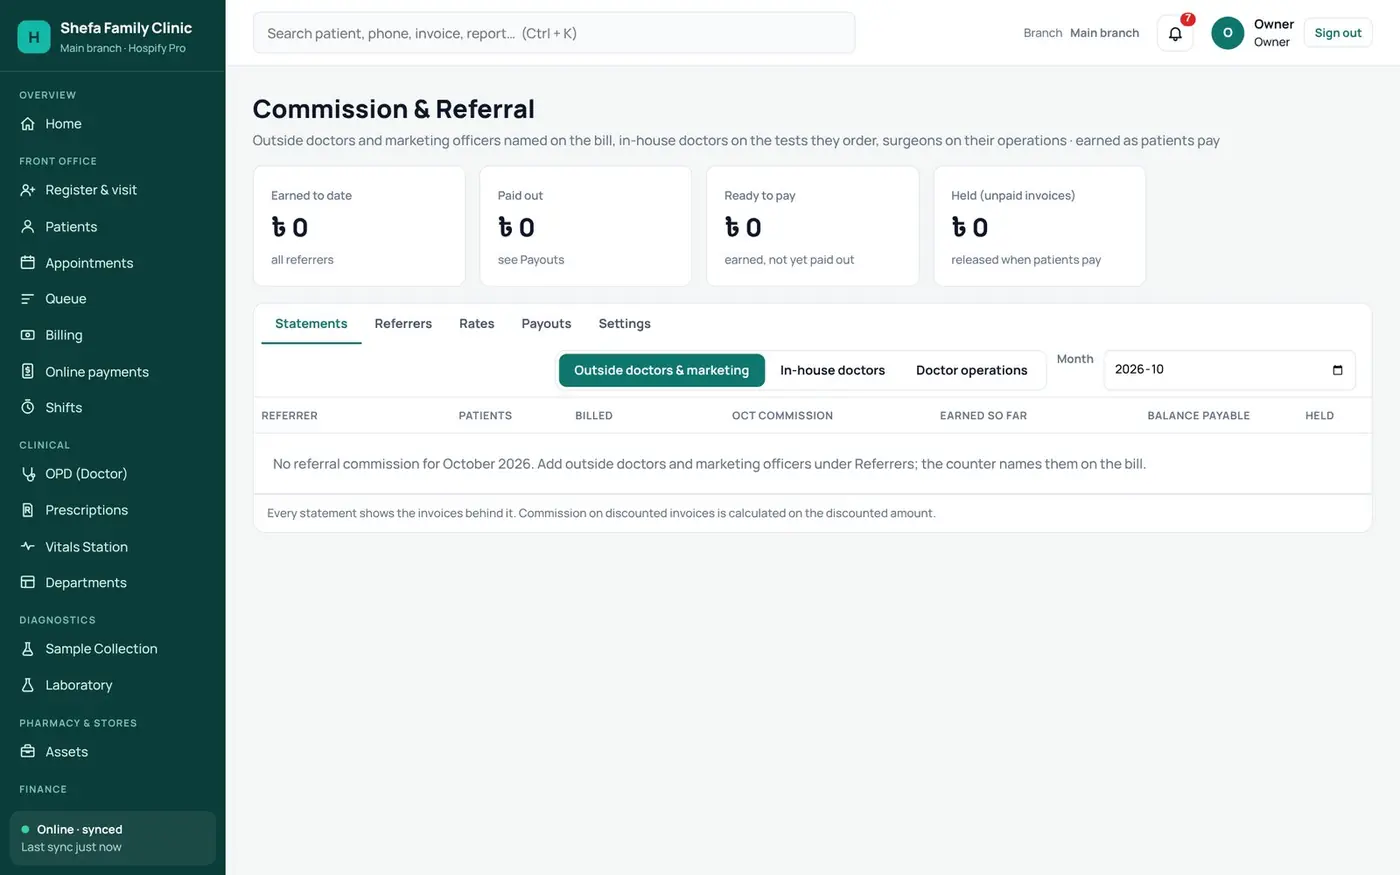
If doctors or agents refer patients, Commission works out what each one earns, as patients pay.
- Outside doctors and agents
- Earned as patients pay
- Payouts
Part 5: Website and reports
Step 18: Your clinic website
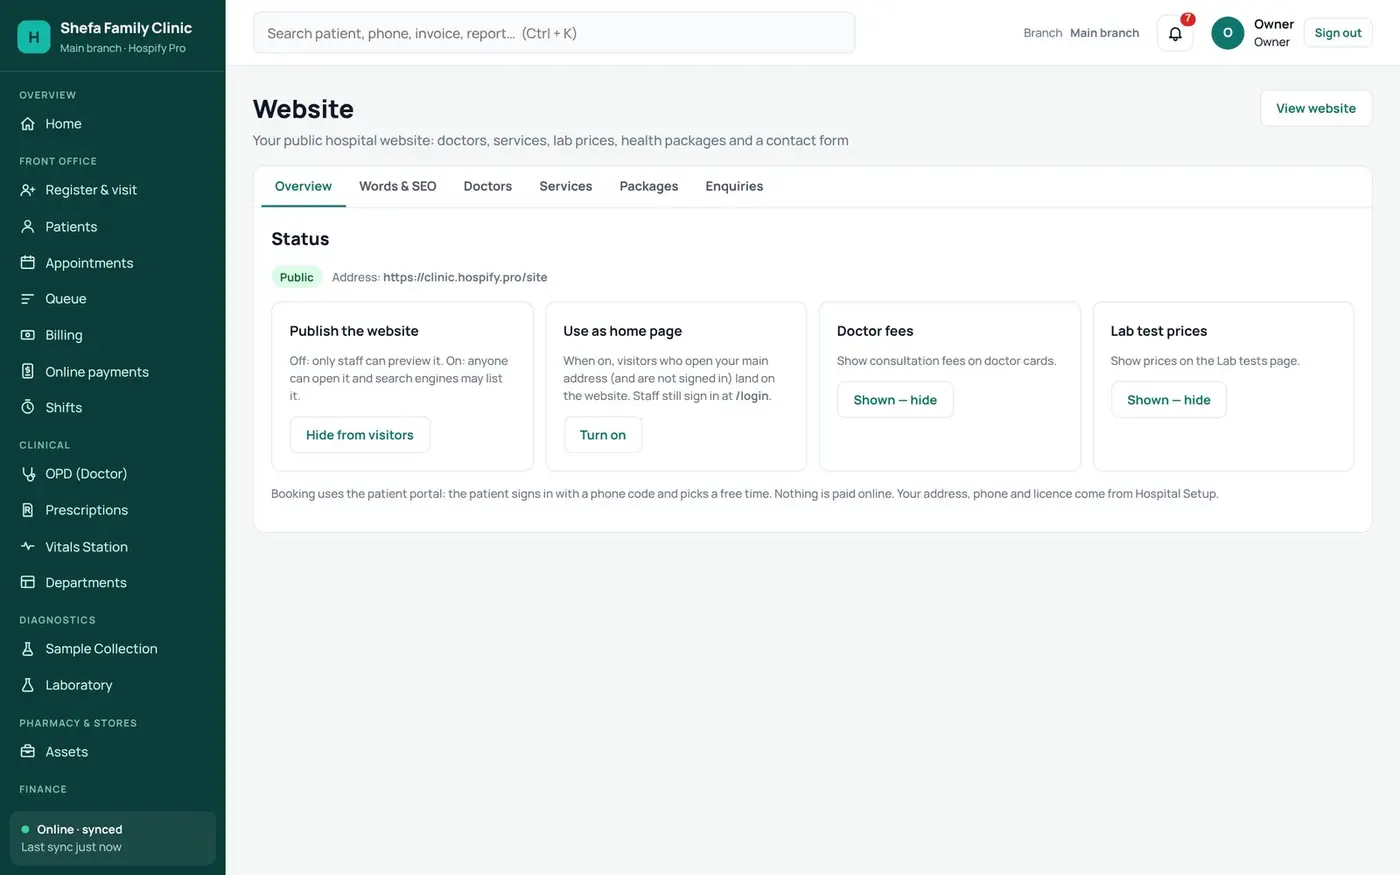
Your clinic gets a website with your doctors, services and lab prices, where patients can book online.
- Doctors, services, prices
- Online booking
- Turn it on in one click
Step 19: Reports
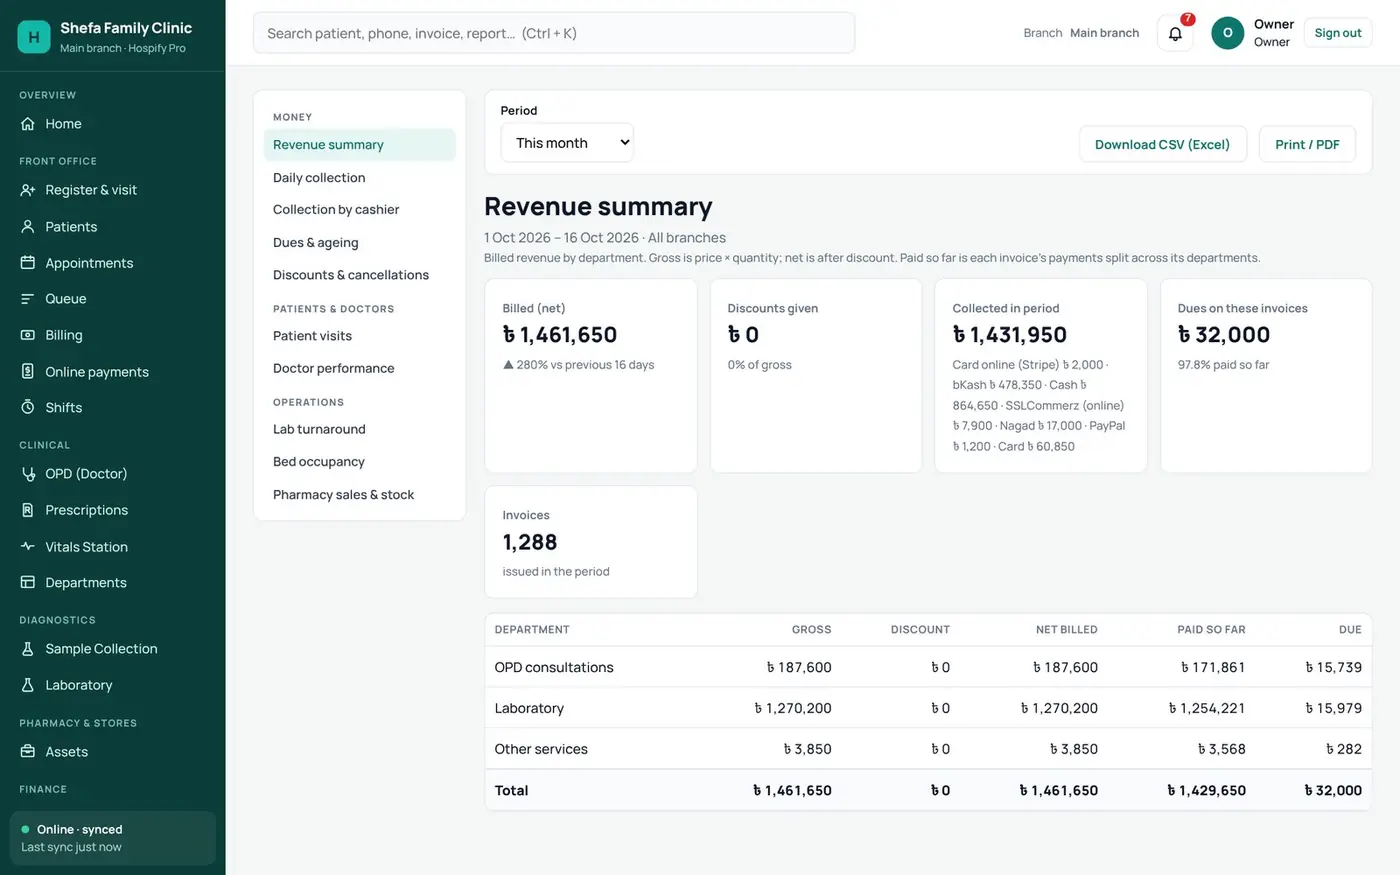
Reports and Analytics shows revenue, collection, dues and doctor performance. Download any report as Excel or P D F.
- Revenue · collection · dues
- Doctor performance
- Excel or PDF
Try it yourself
Open the live clinic demo, or start your free 14-day trial.
Tips and common questions
Can I try it before I sign up?
Yes. Open the [live clinic demo](/live-demo/?type=clinic) and click around with sample data. No sign-up is needed.
What if the internet goes down?
Hospify Pro keeps working offline. Your work carries on and everything syncs when the connection is back.
Who can see patient data?
Only your own staff, and each one sees only the screens their role allows. Every facility has its own private, encrypted database.
How do I get started?
Send a sign-up request at hospify.pro/signup. The first 14 days are free and no card is needed.
Where do I get help?
Open Help & support inside the software, or reach the Hospify Pro team on WhatsApp at +44 7782 256307 or at [email protected].
